Setting up your lab environment
Introduction
In the last lab, you set up your Couchbase database in Capella. Now, you will perform a few additional configuration steps there and then launch your lab environment, which will connect to your database
What you will gain experience with:
-
Set up credentials for a client accessing the Couchify database
-
Launching your lab environment
-
Getting connected to your Capella database
Estimated time to complete: 30 minutes
Instructions
In order to get the lab environment set up, you will need to allow client applications to connect to the database in three key areas.
-
You need to create some database credentials that will be used by the lab environment code
-
You need to obtain the URL to the load balancer that will route client connections to the data service
-
You will need to whitelist the IP address of the server where your lab environment will run.
You will take care of the first two tasks as part of launching the Capella session in your lab environment. Once the session is launched, you will whitelist the IP address.
Configure Database Credentials for your lab environment
-
In the Couchbase Capella Dashboard, locate and select the database
-
Within the database menu, locate and select the Settings tab
-
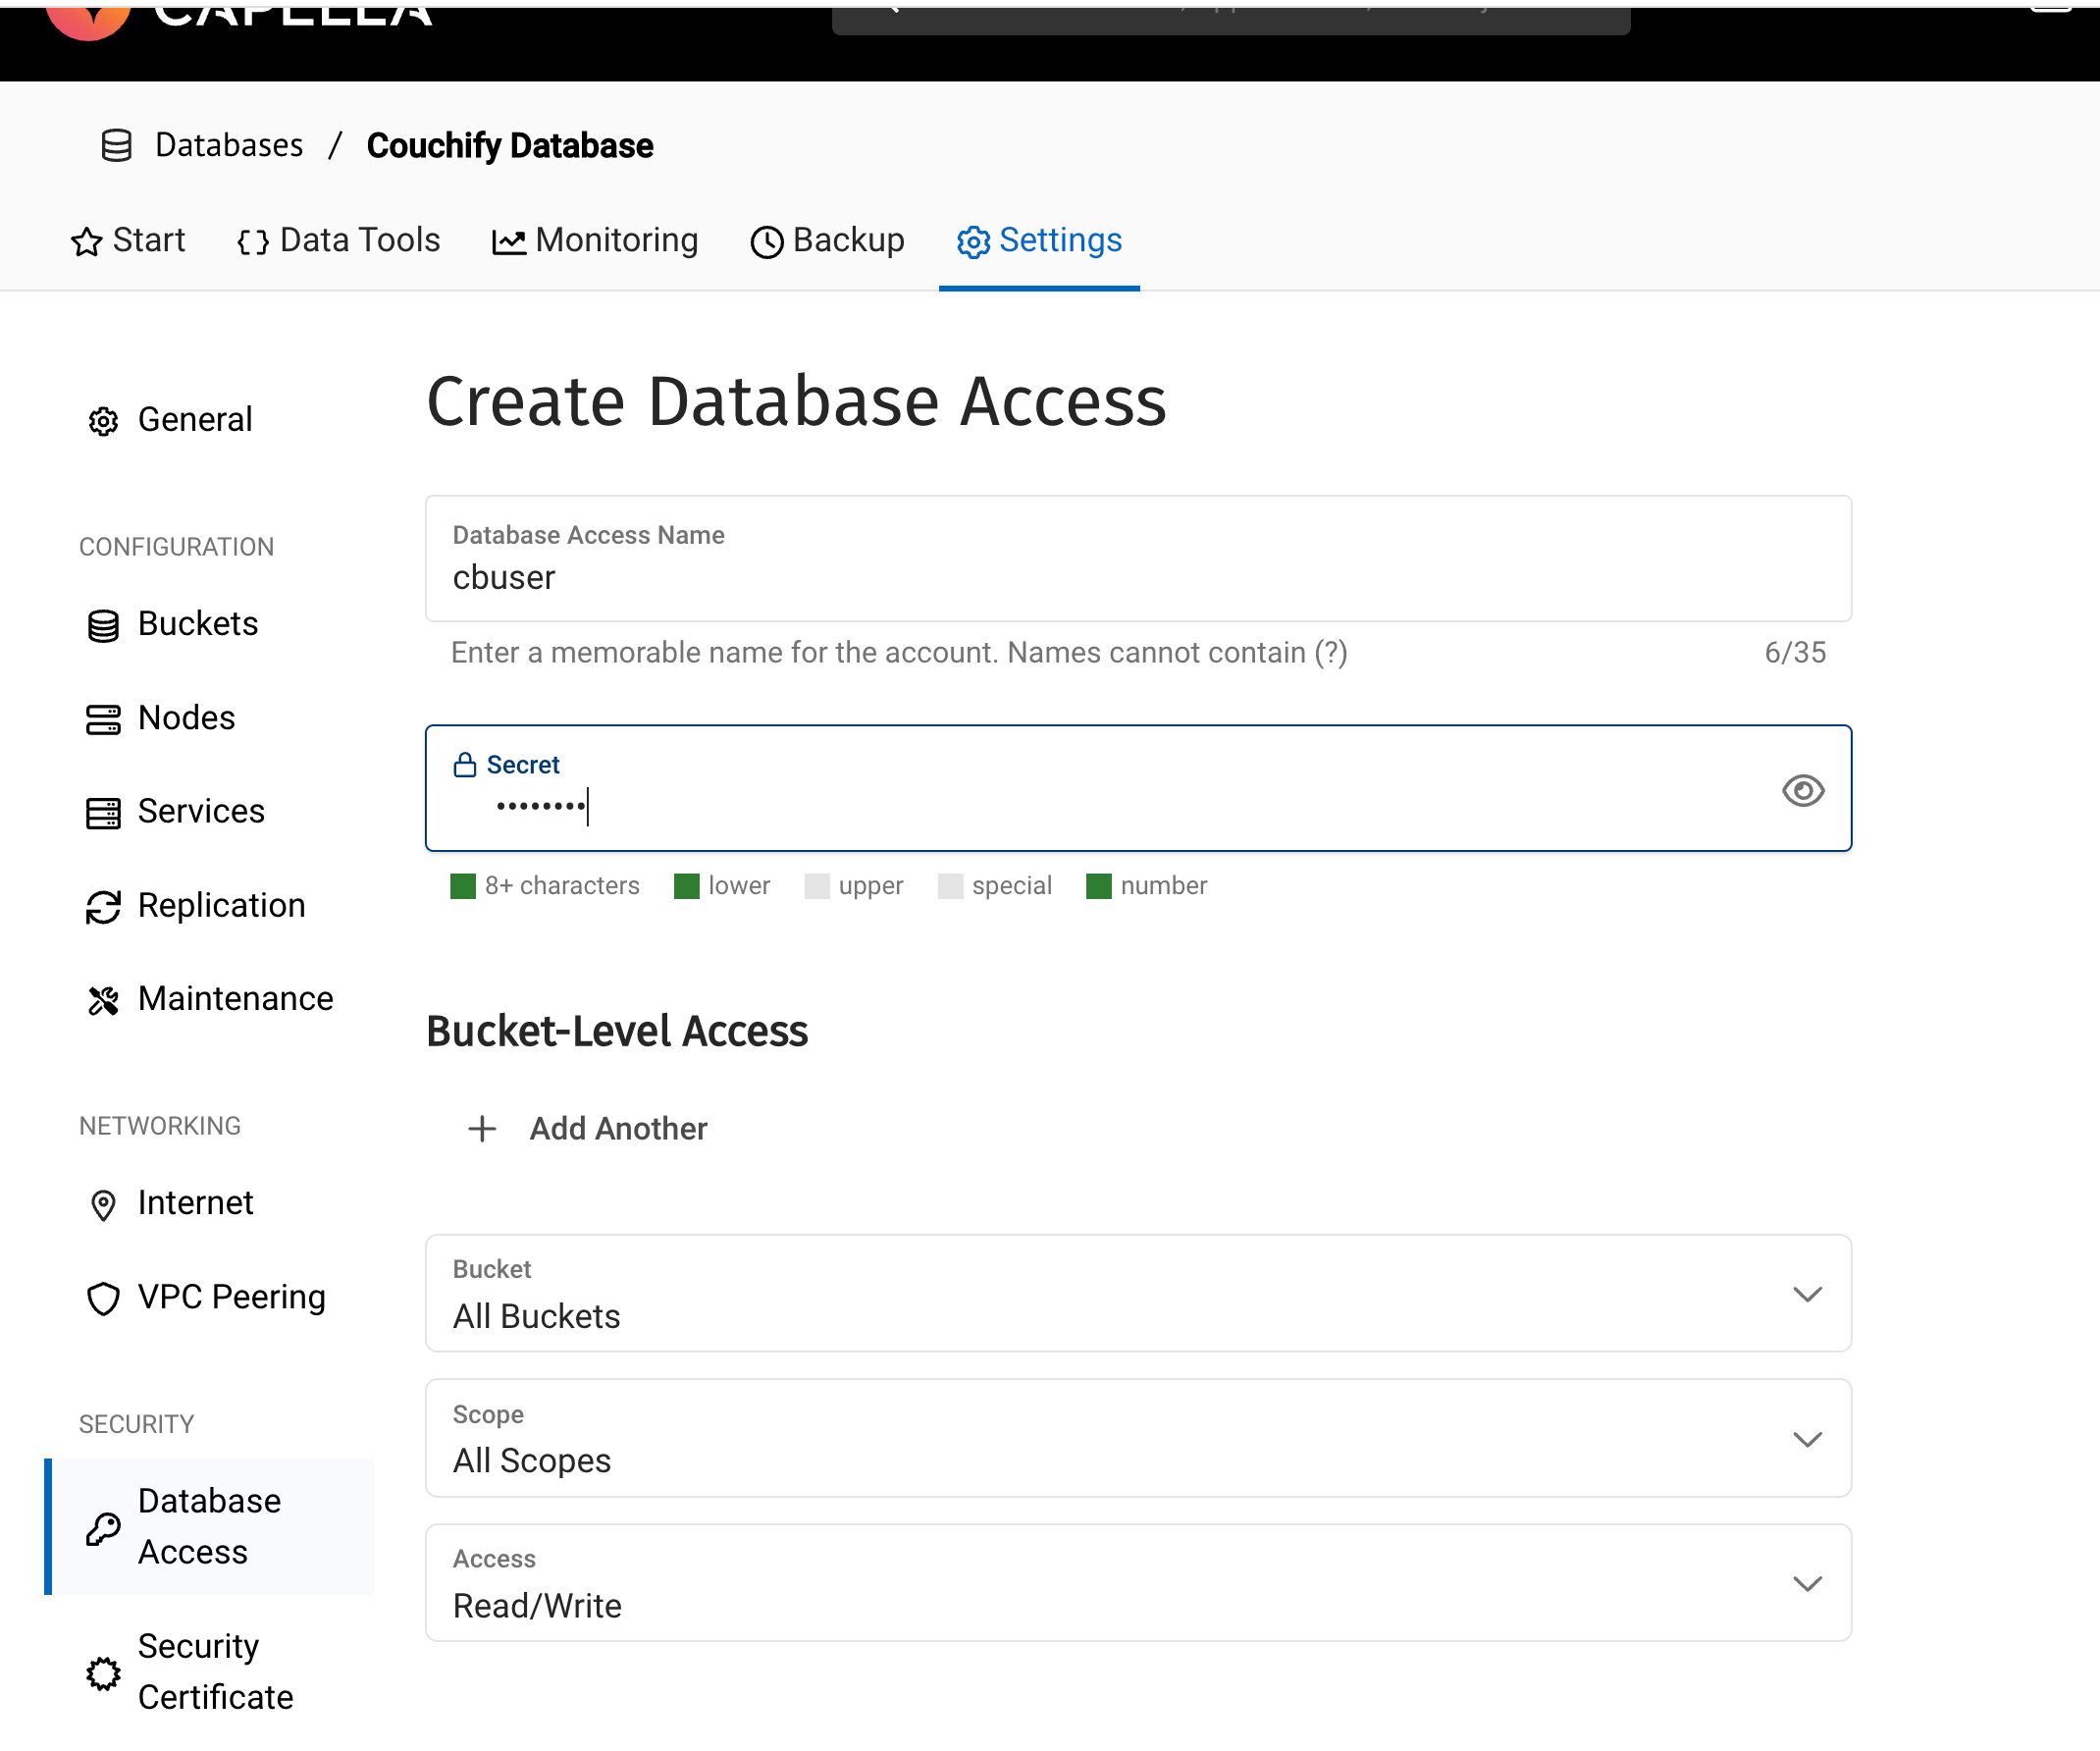
Add a new user by scrolling down, locating and clicking on the Database Access link
-
Create a new database credential, specifying the username (e.g., "cbuser"), and set a password (be sure to make note of this password as you will use that later when connecting your lab environment to the database).
-
Configure this user to access the couchmusic buckets that were created earlier.
-
Configure permissions for All Buckets and All Scopes and for Read/Write permission
-
Note that when the permissions are set, the Read and Write permissions are registered separately.
-
Launching the Lab environment
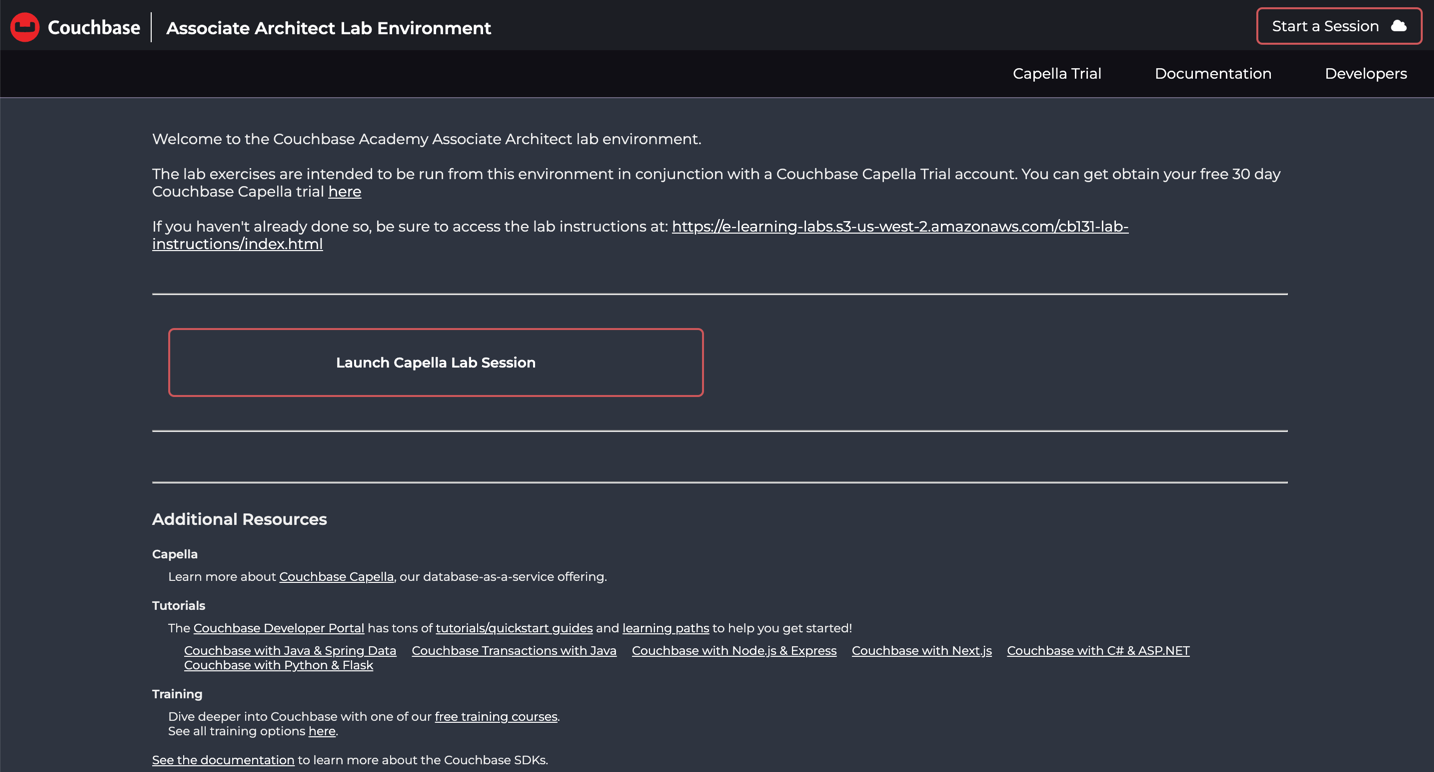
This lab offers a pre-defined lab environment that will be used to connect to your Capella database.
You can access your lab environment at this URL.
Upon entering the lab environment, you will be presented with the entry point to start a lab session.

-
Select 'Launch Capella Lab Session' to create a specific session for you that will allow you to make changes and experiment with the code.
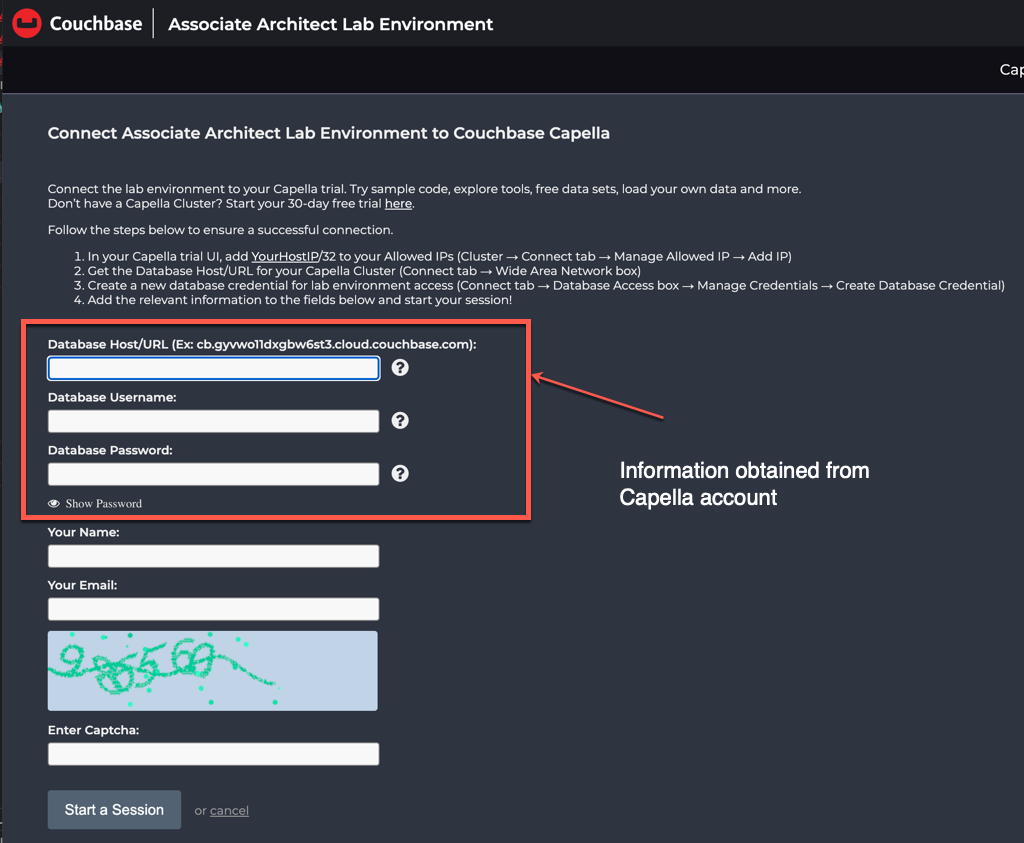
The first three items required are obtained from your Capella database so you will need to return there.
-
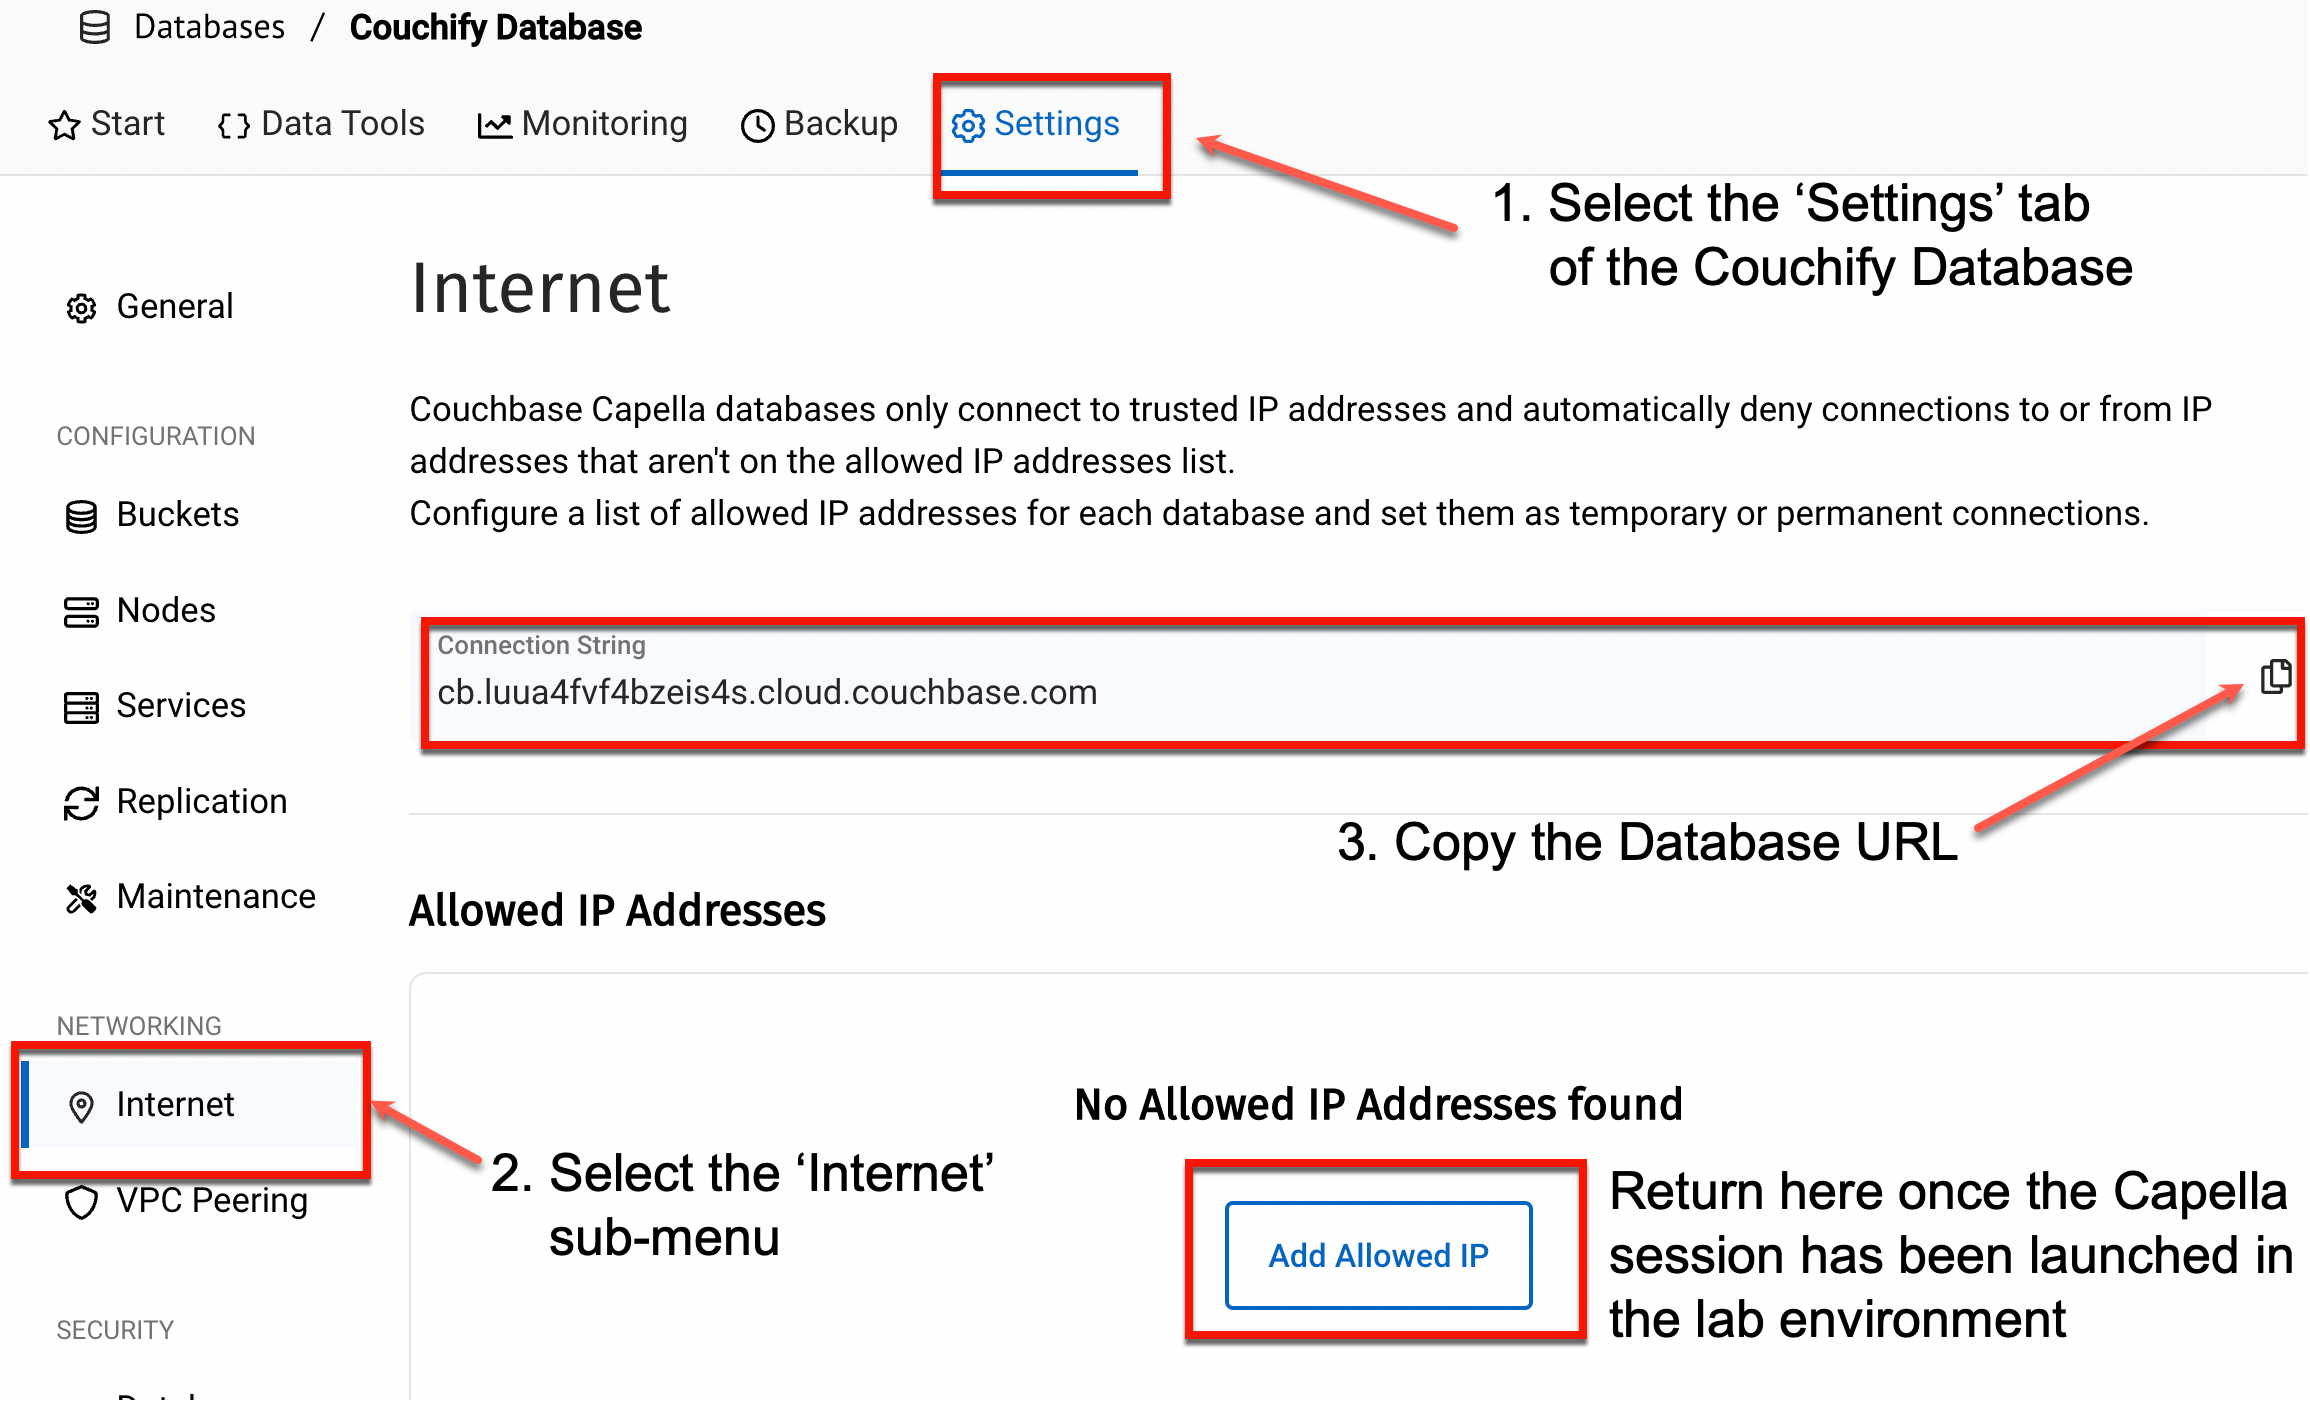
Locate the Settings tab of the database and then locate the Internet sub-menu on the left side.
-
Locate and copy the Database URL.
-
Return to the lab environment session launch page and paste the Database URL.
-
-
You will also need to enter the database username and password you created in the Database Credentials step at the beginning of the lab.
-
Enter your name and email address along with the current Captcha code to launch your session.
-
Once all these items have been provided, press 'Start Session'
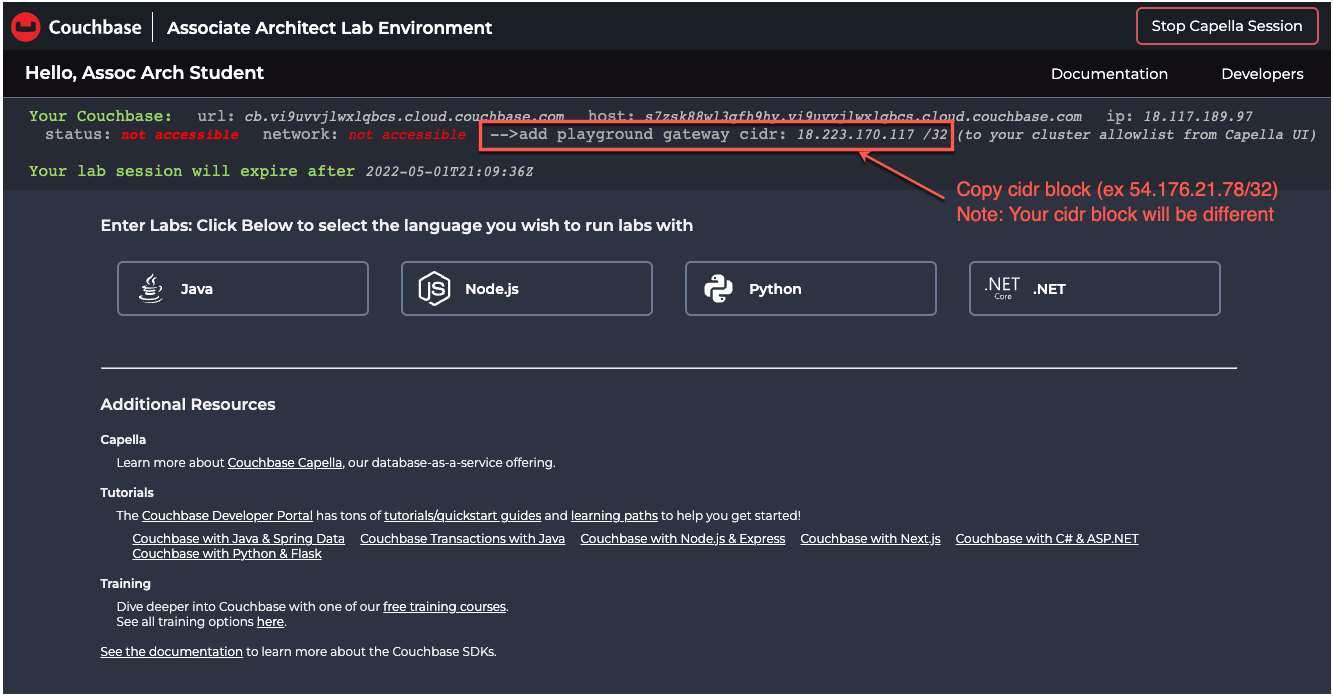
Upon entering the Capella session in your lab environment, you will likely encounter a notice that messages about the database not being accessible. You will need to obtain the IP address of the lab environment and add it to the list of allowed IPs in your Capella database.
|
|
Recall that this is an additional security measure to ensure that only permitted applications are able to access your Couchbase database. |
-
Notice that the Status indicator at the top of the page shows not accessible in red text, indicating that your lab environment has not yet been whitelisted with the database.
-
Locate the Add Playground gateway cidr text at the top of the lab environment and copy the IP address
-
Return to your Capella database, locate and access your Couchify Database and find the Manage Allowed IP button found within the Internet sub-menu of the Settings. This will be how you 'whitelist' the IP address of the machine running the client code. This is a requirement for any clients connecting to the Couchbase Capella database.
-
Follow the steps to add your IP address. This should be added as a permanent IP. You may also wish to add a note regarding the purpose of the IP address being added.
-
Once successfully entered on the Capella side, you should be able to refresh your lab session page.
|
|
This feature is currently not working. Consequently, you will find the status will show an error even though you may have entered the correct information. The ultimate test of success will be running the initial connect test from any of the SDKs. |
If you correctly set up your IP address, the status should show as OK
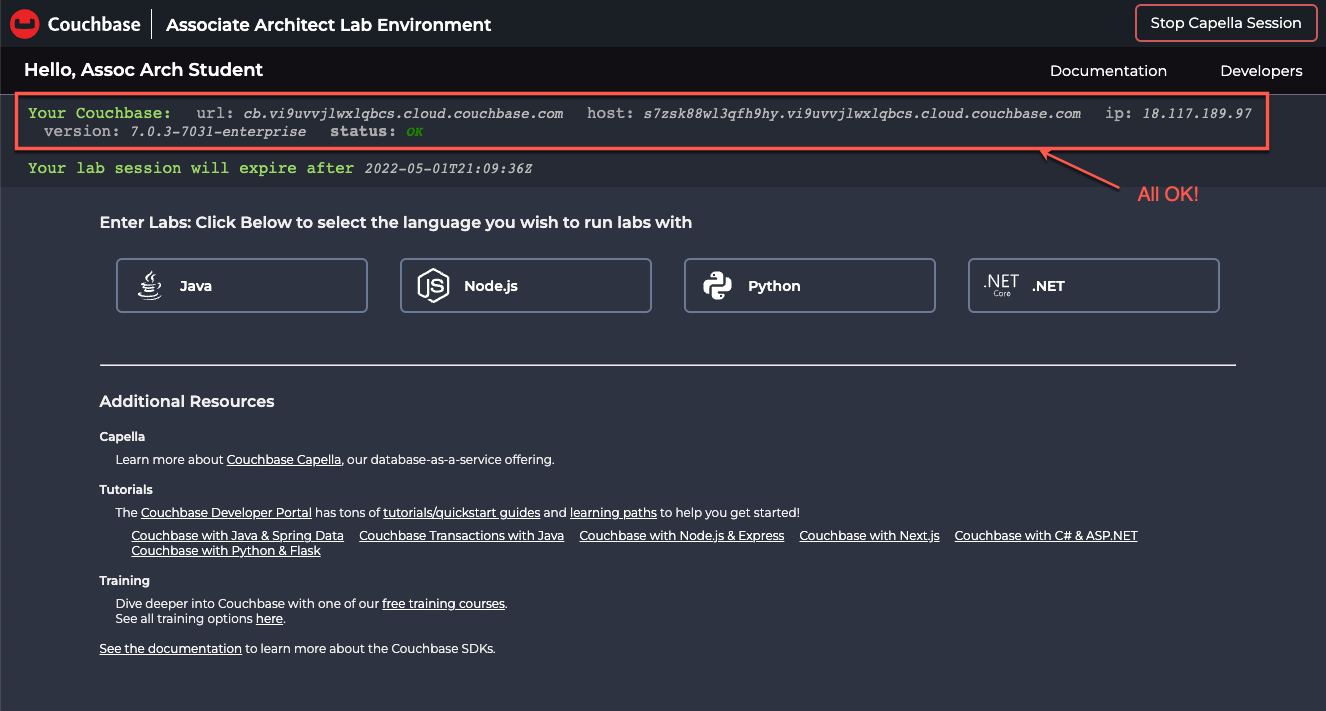
If you reached this point, then you have correctly provided the database URL and whitelisted the IP address of your lab environment.
Verifying correct configuration
You can now verify that you have properly provided the database credential by running the Lab 02: Connect lab, which should be the first code sample you will encounter in any language you decide to use.
If you correctly configured everything, this program should run and report a status OK.
Lab summary
This lab has largely been about getting your Capella database and your lab environment connected together. Recall that any application that would access your database will need the following:
-
Credentials set up defining access permission to the database. These credential (username/password) must be provided to the application code to connect
-
Obtain the URL of the database and provide as part of the connection. Notice that in the application, the connect string includes a couchbases:// prefix There are actually several prefixes that can be used depending on the protocol desired and whether TLS will be used or not. In the case of these examples, couchbases means use the couchbase connection protocol using TLS.
-
To be whitelisted from the database side managed in Capella. Recall that Capella enforces strict security by default, so it is necessary to not only provide the username and password, but to also have the IP address of the running application added to the list of allowed IPs. The IP address to provide will depend on where the application is running. In the case of this lab environment, the code examples are running in a container in AWS, so the IP address used will be for that running instance.
In this lab environment setup, much of the required information is obtained from the Capella database that is running and provided when launching the lab session. Once this session has been launched, it will be active for 30 days.
Congratulations, you have completed this lab.